1、安装LabVIEW软件,安装教程在上一篇经验中已经详细介绍过了,
有必要还请查看一下;

2、安装好LabVIEW软件后,需要安装一个VISA的LabVIEW插件,
功能是管理串口,Labview与Arduino之间的通讯全靠这个插件完成。
在ni官网中下载VISA插件;

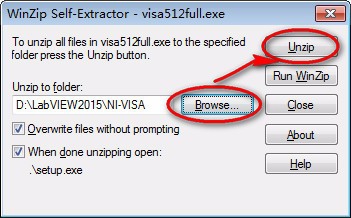
3、双击visa插件进行安装;

4、接着进行选择路径,进行解压,弹出进度条,如图所示:


5、进行NI-VISA的安装,直接进行下一步,

6、选择NI-VISA的安装路径,
点击下一步;


7、软件许可协议,点击我接受即可;

8、开始安装,弹出安装进度条;


9、点击finish,安装成功;

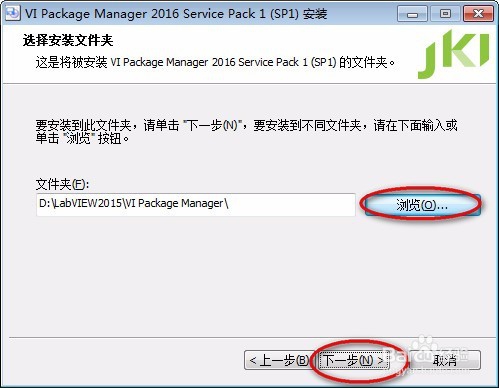
10、VISA安装好后,我们开始安装Labview Interface for Arduino, 安装这个需要用到一个软件叫 JKI VI Package Manager (VIPM) Community Edition (free);
可以在百度上面搜一下,进入官方网站下载free版本,

11、点击vipm软件,显示安装向导。如图所示:

12、在向导界面,点击下一步;选择接受协议,再下一步;

13、选择安装路径,点击下一步;
14、快捷方式的创建;点击安装按钮;弹出安装进度界面;


15、安装完成;

16、LabVIEW Interface for Arduino安装:
双击打开安装成功的VI Package Manager软件,找到LabVIEW Interface for Arduino进行安装;

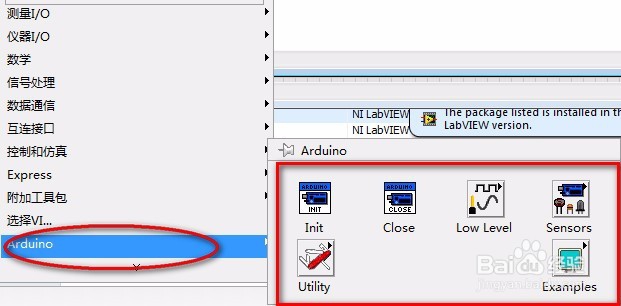
17、效果查看:
打开LabVIEW 2015,新建VI,在程序面板中函数--arduino中显示;点赞哦!