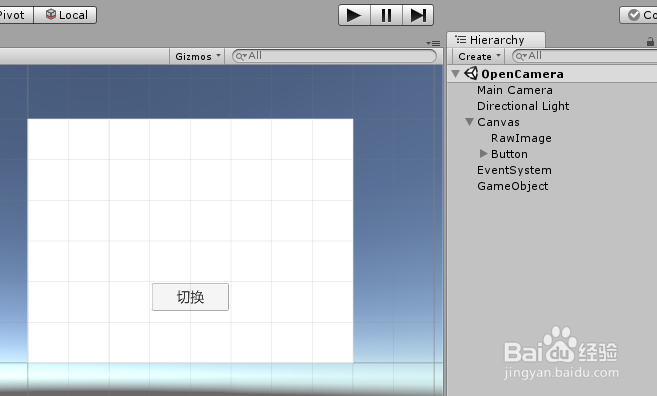
1、打开Unity,新建一个空工程,在场景中添加 RawImage 和 Button,RawImage 铺满Canvas,Button 适当调整大小和布局,具体如下图

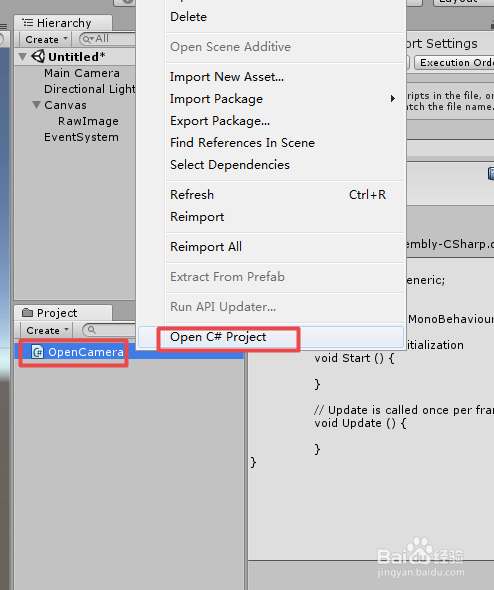
2、在工程中新建一个脚本 OpenCamera,双击打开编辑代码,具体代码和代码说明如下图
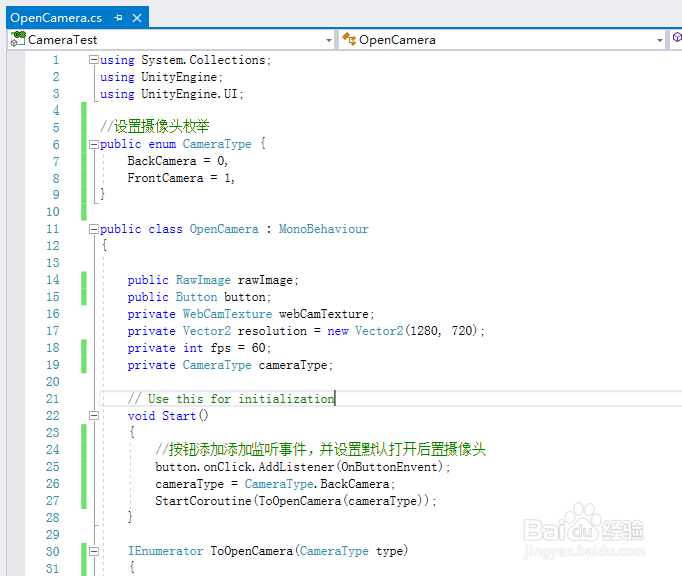

3、OpenCamera 脚本具体内容如下:
using System.Collections;
using UnityEngine;
using UnityEngine.UI;
//设置摄像头枚举
public enum CameraType {
BackCamera = 0,
FrontCamera = 1,
}
public class OpenCamera : MonoBehaviour
{
public RawImage rawImage;
public Button button;
private WebCamTexture webCamTexture;
private Vector2 resolution = new Vector2(1280, 720);
private int fps = 60;
private CameraType cameraType;
// Use this for initialization
void Start()
{
//按钮添加添加监听事件,并设置默认打开后置摄像头
button.onClick.AddListener(OnButtonEnvent);
cameraType = CameraType.BackCamera;
StartCoroutine(ToOpenCamera(cameraType));
}
IEnumerator ToOpenCamera(CameraType type)
{
//获取摄像头权限
yield return Application.RequestUserAuthorization(UserAuthorization.WebCam);
if (Application.HasUserAuthorization(UserAuthorization.WebCam))
{
//停止正在使用的摄像头
if (webCamTexture != null)
{
webCamTexture.Stop();
}
//判断时候有摄像头
if (WebCamTexture.devices.Length != 0)
{
//new一个摄像头并且设置分辨率和FPS,渲染到UI上
webCamTexture = new WebCamTexture(WebCamTexture.devices[(int)type].name,
(int)resolution.x, (int)resolution.y, fps);
rawImage.texture = webCamTexture;
webCamTexture.Play();
}
}
}
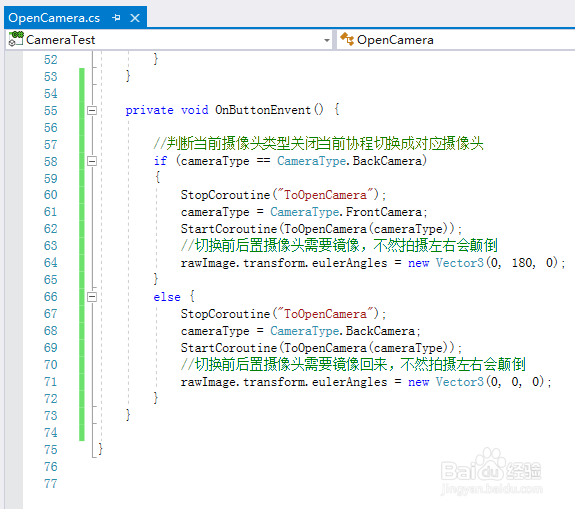
private void OnButtonEnvent() {
//判断当前摄像头类型关闭当前协程切换成对应摄像头
if (cameraType == CameraType.BackCamera)
{
StopCoroutine("ToOpenCamera");
cameraType = CameraType.FrontCamera;
StartCoroutine(ToOpenCamera(cameraType));
//切换前后置摄像头需要镜像,不然拍摄左右会颠倒
rawImage.transform.eulerAngles = new Vector3(0, 180, 0);
}
else {
StopCoroutine("ToOpenCamera");
cameraType = CameraType.BackCamera;
StartCoroutine(ToOpenCamera(cameraType));
//切换前后置摄像头需要镜像回来,不然拍摄左右会颠倒
rawImage.transform.eulerAngles = new Vector3(0, 0, 0);
}
}
}
4、脚本编译正确,回到Unity,把脚本挂载到GameObject上,并且对应赋值 RawImage和 Button,具体如下图

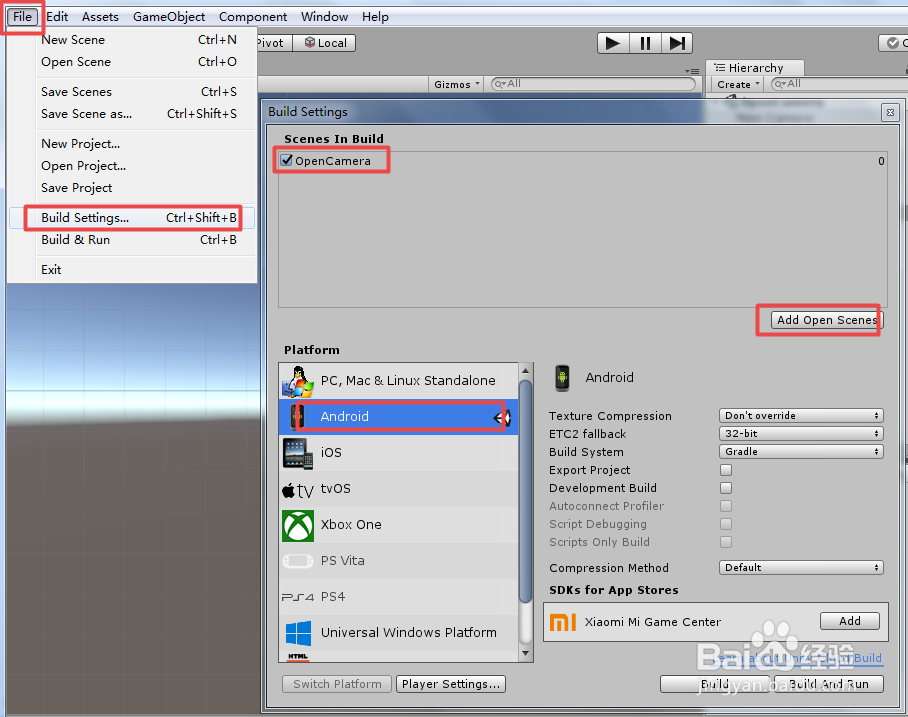
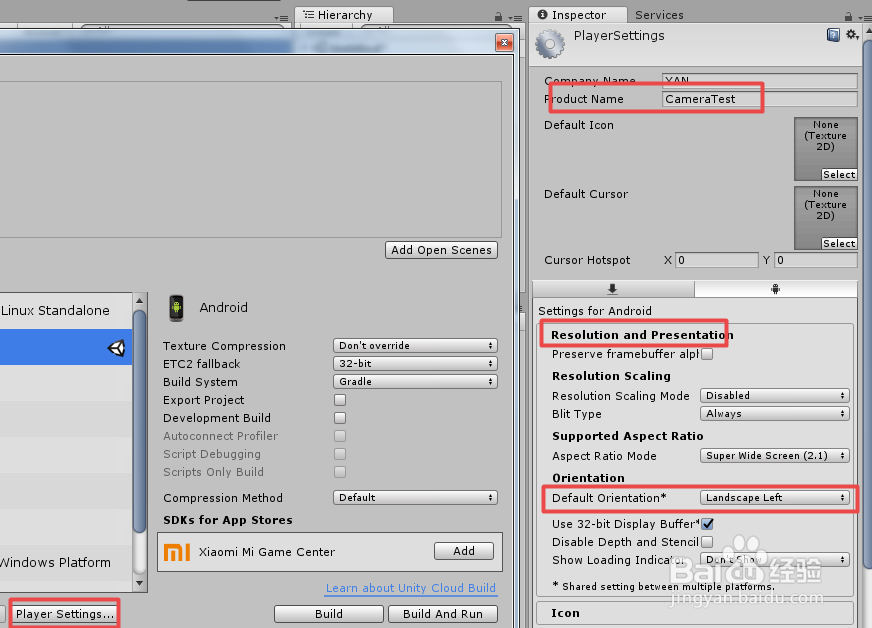
5、切换编译平台以及设置默认的Orientation,具体如下图
6、编译打包,手机上运行应用,前后置效果如下


7、到此,《Unity 摄像头教程之 全屏自由切换前后置摄像头》讲解结束,谢谢